The Quick Answer
Connector replacement is one of the most common service calls. A user trips on a cable, an installer steps on the connector, a rodent chews through the strain relief, or a damp basement corrodes the contacts. The cable itself is fine. Only the plastic plug is destroyed.
Replacement takes about three minutes if you have the right tools. Pulling new cable takes hours. Always check the connector first.
Diagnose Before You Cut
Before you cut off the existing connector, confirm that the connector is the actual problem. Sometimes the cable itself has been damaged inside the wall and replacing the plug will not fix anything.
Signs the connector is the problem
- Visible damage: Broken latch, cracked housing, bent contact pins, or burnt smell.
- Corrosion on contacts: Green or black tarnish on the gold-plated contact blades. Common in damp environments and outdoor terminations.
- Loose fit: The connector wiggles in the jack or falls out without the latch holding it.
- Intermittent connectivity: Link comes and goes when the cable is moved at the connector.
Signs the cable might be the problem
- The connector looks fine but you have no link or low speed
- The cable has been pinched or stretched somewhere along the run
- The wall jack at the other end recently failed too
- Wire map test shows opens that move depending on cable position
For diagnosing problems before you start cutting, see our troubleshooting network cable problems guide.
Step 1: Cut the Damaged Connector Off
Use diagonal cutters or flush cutters and cut perpendicular to the cable, right at the back edge of the connector. The goal is a clean square cut that does not crush the cable jacket. A crushed jacket is harder to strip and may have damaged the conductors underneath.
Inspect the cut end. The jacket should be a clean ring of insulation, the conductors inside should be intact, and there should be no visible distortion of the pair geometry. If the cable is crushed for an inch or two behind the connector (common with cables that got stepped on at the floor), cut back to clean cable. Lose another inch or two but get a clean working surface.
Step 2: Strip the Jacket
Strip 1.5 inches of jacket. Use a stripper with adjustable depth so the blade scores the jacket without nicking the conductors. After scoring, flex the cable and the jacket should split cleanly. Discard the jacket sleeve.
For Cat6A, strip closer to 2 inches because the central separator needs to be trimmed and you want enough conductor length to seat fully into the connector. For solid Cat5e in a horizontal run, 1.5 inches is plenty.
Watch for these mistakes
- Nicked conductor. A scored conductor is a future failure point. If you see copper exposed under the insulation of any of the eight wires, cut back another half inch and start over.
- Pulled-back insulation. If the jacket is split lengthwise instead of cleanly cut, the wire insulation may have been peeled along with it. Inspect each conductor.
- Stretched cable. If the jacket pulled off but the wires are visibly stretched or thinned, you have damaged conductors. Cut back farther.
Step 3: Identify Cable Type and Match the Connector
Before you grab a connector, identify what cable you are working with. Look at the printing on the jacket. Most cable lists the category, conductor gauge, and any special features (shielded, plenum, riser).
| Cable Type | Recommended Connector | Crimp Tool |
|---|---|---|
| Cat5e UTP | EZ-RJ45 Cat5/5e | EzEX or PTS PRO Universal |
| Cat6 UTP | EZ-RJ45 Cat6 | EzEX or PTS PRO Universal |
| Cat6 (large jacket) | ezEX44 Cat6 | EzEX or PTS PRO Universal |
| Cat6A UTP | ezEX48 Cat6A | EzEX or PTS PRO Universal |
| Cat6 STP | Shielded EZ-RJ45 Cat6 | PTS PRO Universal |
| Cat6A STP / Cat7 | Cat6A/7 Shielded | PTS PRO Universal |
For more on choosing the right plug, see our RJ45 connector types explained and EZ-RJ45 vs ezEX connectors.
Step 4: Identify the Existing Wiring Standard
Look at the connector you just cut off. Even if the connector is destroyed, the wire order in the residue should still be visible. Note which color is on pin 1.
- If pin 1 is white/orange, the cable is wired T568B. Use T568B on the new connector.
- If pin 1 is white/green, the cable is wired T568A. Use T568A on the new connector.
This matters because the cable will not work end-to-end if the standard does not match the other end. If you cannot tell from the cut-off connector, check the other end of the cable run. Whatever standard is on the working end is what you need to match.
For more on the standards, see our T568A vs T568B guide.
Step 5: Untwist, Arrange, Insert, Crimp
The actual termination is identical to making a new patch cable. Untwist each pair just enough to lay the wires flat, arrange them in the matching standard, and insert.
Pass-through technique
For pass-through connectors like the EZ-RJ45 family, push the wires all the way through the front of the connector. Verify the order is correct by looking at the wires emerging from the front. If a wire is short or out of order, pull everything back and reset.
Standard connectors
For standard (non-pass-through) connectors, trim the wires to about half an inch beyond the jacket. Insert into the connector and verify each wire reaches its contact at the front of the connector body. The jacket should extend into the strain relief area at the back of the connector.
Crimp
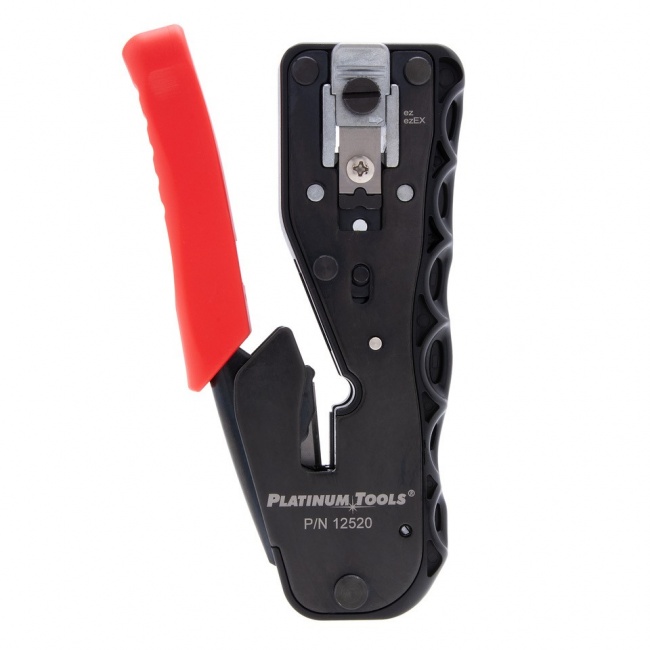
Use the matching crimp tool. The PTS PRO Universal Crimp Tool is a good general-purpose choice. The EzEX Crimp Tool is the dedicated tool for the EZ-RJ45 and ezEX family. Complete the full ratchet cycle.
Step 6: Test Before You Re-Install
Plug the cable into a tester and run a wire map test before reinstalling the cable in the patch panel or attaching the device. Verifying the termination at the bench is much faster than discovering a fault after you have routed the cable back into the rack.
Pass criteria
- All 8 pins show continuity end-to-end
- No shorts between adjacent pins
- No reversed or crossed pairs
- For shielded cable: shield continuity passes
- For Cat6A: speed test confirms 10 Gbps link
If the test fails, cut off the new connector and start over. Do not try to fix a marginal crimp by recrimping the same connector. Once it has been crimped, the connector is committed. The IDC contacts have already taken their bite into the conductors and additional crimping does not improve the connection.
Replacing on Specific Cable Types
Solid conductor (in-wall cable)
Most horizontal cable runs use solid conductor cable. Solid conductors hold their shape inside the connector and crimp cleanly with pass-through technology. The risk with solid conductor is that aggressive bending at the connector can fatigue-fracture the conductor over time, especially if the cable is repeatedly flexed. Use a strain relief boot to limit flexing at the termination.
Stranded conductor (patch cable)
Stranded cable uses connectors with three-tine contact blades that bite between the strands rather than relying on a single point of contact. If you replace a connector on stranded cable, make sure the replacement plug is rated for stranded conductors. Using a solid-rated connector on stranded cable produces unreliable contact because the single-tine blade slides between strands without making solid contact.
Shielded cable
Replacing a connector on shielded cable requires extra steps: fold back the foil shield and drain wire onto the jacket, slide on the metal shroud, and crimp with a tool that handles shielded plugs. Use the Shielded EZ-RJ45 Cat6 or Cat6A/7 Shielded Connector as appropriate.
Outdoor cable
Outdoor-rated cable has UV-resistant jackets that are stiffer and harder to strip than indoor cable. Use a stripper with a sharp blade and adjust depth carefully. The conductors underneath are standard copper but the overall cable is bulkier; account for the extra diameter when matching to the connector.
Preventing Future Connector Failures
Replacing connectors is fast, but preventing the failure in the first place is faster.
Use strain relief boots
A strain relief boot adds an external sleeve that protects the cable jacket from sharp bending right at the connector. Boots cost pennies per cable and reduce connector replacement calls dramatically over the life of an installation. Match boot color to your wiring scheme so they double as labels.
Choose pass-through connectors
Pass-through connectors like the ezEX48 Cat6A and EZ-RJ45 Cat6 reduce installation errors because you can verify wire seating before crimping. Fewer installation errors means fewer early failures.
Cable management at the device end
Connectors fail because cables get bumped, stepped on, or jerked. Properly secured cables with adequate slack and strain relief survive normal office activity. Good cable management at the wall plate, the patch panel, and the device end pays back many times over in reduced service calls.
When You Cannot Replace and Have to Splice
If the cable is too short after cutting back to clean cable (often happens with rodent damage that runs several feet down the cable), you have two choices.
Inline coupler
Install a coupler in line with a short patch cable to bridge the gap. This is acceptable for service work where the customer does not care about Cat6A certification. The coupler adds a discontinuity that affects 10 Gbps performance and adds two extra termination points that can fail later.
Pull new cable
The right answer for new installations and any job that requires Cat6A certification. Pull a new run, terminate both ends fresh, and certify. The labor is more expensive but the result is a clean cable that will pass certification and last for the lifetime of the installation.
For pulling new runs through existing walls, see our how to pull Ethernet cable for long runs.
Recommended Products
Replacement Connectors
Pass-through RJ45 connectors for fast field termination
Stock the connector category that matches your installed cable base.
Crimp Tools
Universal and dedicated tools for EZ-RJ45 and ezEX
PTS PRO covers all common connector families. EzEX is the dedicated tool for the EZ-RJ45 and ezEX line.
Verification
Confirm the new termination passes wire map and speed
Test every replacement before re-installing the cable in service.
Related Articles
Frequently Asked Questions
Can I reuse the existing RJ45 connector?
No. RJ45 connectors are single-use. Once an IDC contact has bitten into a conductor, the contact is permanently displaced. Trying to reuse a connector will produce intermittent or open connections. Always use a fresh connector when replacing a termination.
How much cable do I lose by replacing the connector?
About 1.5 to 2 inches per termination. You cut off the damaged connector, strip the jacket back, and re-terminate. On a horizontal cable run, losing two inches per connector replacement is well within the slack you should have built into the original run. If your cable was cut to exact length with no slack, you may need to pull new cable instead.
Why do RJ45 connectors fail?
The most common failures are broken latches, corroded contacts, worn contacts, and crushed strain relief. Replacing the connector fixes all four issues. For long-term reliability, install a strain relief boot and use the correct connector for the cable category.
Can I replace just one connector or do I need to replace both ends?
Replace only the failed end. The good end of the cable is fine. After replacing the bad connector, run a full wire map test with a VDV MapMaster 3.0 to verify the new termination is correct. If both ends test pass and the speed is right, you are done.
What if the cable is too short after cutting off the damaged end?
If you have lost too much length to reach the patch panel or the wall jack, splice in a coupler and a short patch cable (acceptable for service work, not ideal for new installations), move the equipment slightly closer, or pull new cable for that one run. For Cat6A and certified jobs, pulling new cable is the right answer.
Stock the Replacement Connectors and Tools
Three minutes per replacement vs hours pulling new cable. Stock the connectors that match your installed base and the crimp tools that handle them all.